Every veteran mechanic carries a memory of an oil seal that leaked within hours of installation. The seal itself was not defective; it was murdered by a burr, a crooked start, or a hammer blow to the wrong surface. Proper oil seal installation is a craft that blends cleanliness, precision, patience, and the correct tooling. When done right, the oil seal disappears into the machine and performs its job silently for tens of thousands of hours. When rushed, it becomes a persistent source of frustration, downtime, and repeated repairs. This guide walks through the principles, techniques, and pitfalls that separate a lifelong oil seal from an early failure.
Why Correct Oil Seal Installation Defines Component Life
An oil seal operates with a contact band on the shaft that is only a few microns wide. The difference between a successful installation and an immediate leak is often measured in thousandths of an inch of misalignment or a single scratch invisible to the naked eye. Correctly seating an oil seal preserves the micro-geometry of the lip, maintains the calibrated tension of the garter spring, and ensures that the static outer diameter seal remains intact. Every hour spent on preparation and proper driving technique returns tenfold in extended service intervals. In heavy trucking, where a roadside wheel oil seal replacement can cost a fleet an entire shift of productivity, the value of correct installation is not theoretical; it shows up directly on the maintenance budget.

Understanding the Oil Seal Before Touching a Tool

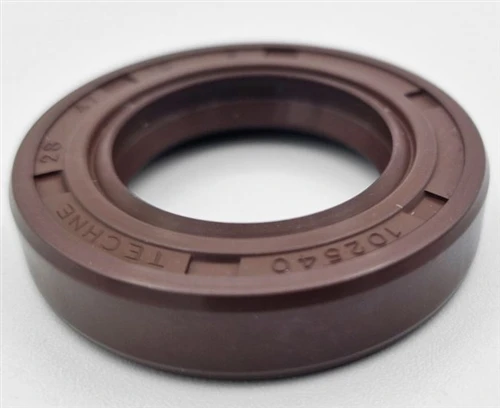
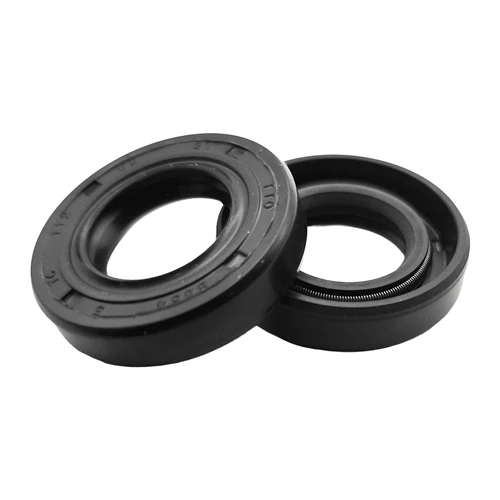
An oil seal is not a simple rubber washer. It is a precision assembly consisting of a metal case, an elastomeric sealing lip, a garter spring, and often a secondary dust lip. The lip geometry is engineered to pump oil back toward the sump during rotation, a function that depends entirely on the seal being square to the shaft and free of installation damage. A metal cased oil seals design provides a rigid press-fit into the housing bore, while the flexible lip rides on the shaft with a carefully controlled interference. Recognizing this dual nature - rigid outer case, delicate inner lip - is the first step toward installation mastery.
Internal Anatomy of a Rubber Shaft Seal
A rubber shaft seal typically features an elastomer-coated outer diameter that seals the bore and compensates for minor surface imperfections. Inside, the primary oil lip seal profile includes a spring-retaining groove that holds the garter spring precisely in place. The oil lip seal itself is angled to generate hydrodynamic lift without floating the lip off the shaft. This internal complexity means that any force applied to the wrong surface during installation can destroy the seal before it ever sees a drop of oil.

Directional Orientation of the Oil Lip Seal
Many oil lip seal designs incorporate spiral grooves on the shaft contact surface that actively pump oil inward. Installing a directional oil lip seal backward transforms it from a pump that retains oil into one that actively ejects oil, guaranteeing a leak. Before removing the old oil seal, a quick photograph of its orientation can save hours of diagnostic confusion later. The oil lip seal orientation relative to the oil sump is not a suggestion; it is a fundamental design parameter.
Preparing the Housing Bore for an Oil Seal

The most overlooked phase of oil seal installation happens before the new seal leaves its packaging. The housing bore must be immaculately clean, completely free of old sealant residue, corrosion scale, and the scratches that accumulate over previous replacements. A dirty bore prevents a metal cased oil seals from seating squarely, creating an uneven static seal that will leak regardless of the dynamic lip's condition. Using a fine emery cloth followed by a solvent wipe, the bore should be cleaned until a white rag shows no discoloration. Any burrs at the bore entrance must be removed with a deburring tool; a sharp edge can shave material off the seal case during insertion and create a permanent leak path.
Bore Inspection Before Installing a Metal Cased Oil Seals
A metal cased oil seals relies on a precise interference fit between its drawn steel shell and the housing. If the bore is scored from a previous removal attempt that involved prying with a screwdriver, the new metal cased oil seals will inherit those grooves and leak through them. In severe cases, a bore-repair sleeve or a sealant applied to the outer case becomes necessary. Experienced technicians always inspect the bore with a bright light and run a fingertip around its circumference before committing to an installation. A clean, smooth bore is the foundation upon which every successful oil seal installation rests.

Measuring Bore and Shaft Dimensions
Shaft diameter and bore dimensions should be verified with a micrometer or dial caliper before selecting a replacement oil seal. Shafts can wear down by several thousandths of an inch over years of service, and a bore can become elongated from repeated installations. A standard-size oil lip seal installed on an undersized shaft will lack the necessary radial interference and will leak from the first rotation. Similarly, an oversized bore will fail to hold a metal cased oil seals securely, allowing the entire oil seal to spin or walk out under vibration.
Shaft Surface Preparation Before Oil Seal Installation

The shaft surface where the oil lip seal rides must be as close to perfection as field conditions allow. Pitting, grooving, or corrosion on the shaft will act like a rasp against the delicate lip, chewing it away within hours. If a wear groove has formed at the original contact line, simply placing a new oil lip seal at the same axial position guarantees rapid failure. Two solutions exist: either position the new oil seal slightly deeper or shallower so the lip contacts a fresh shaft surface, or install a wear sleeve that provides a pristine running track. A truck oil seal operating in grit-laden environments often requires a wear sleeve as standard practice during preventive maintenance.
Shaft Finishing and Surface Hardness
The surface finish of the shaft directly under the oil lip seal should fall within a specific roughness range. Too smooth, and the hydrodynamic film cannot form; too rough, and the lip abrades prematurely. Shaft hardness is equally critical; a soft shaft will wear under the oil lip seal, gradually opening up clearance and reducing radial load. In applications where a truck oil seal must survive extended high-speed operation, induction-hardened shafts with a ground finish provide the longest seal life.
Tooling Essentials for Correct Oil Seal Installation
Improvised tools account for a large share of oil seal installation failures. Hammers, flat screwdrivers, and sockets that do not match the seal diameter are responsible for distorted cases, dislodged springs, and cut lips. A proper oil seal installation kit includes stepped drivers that match a range of seal diameters, a dead-blow hammer, and alignment pilots that keep the seal square as it enters the bore. For a metal cased oil seals design, the driver must contact the outer case only, distributing force evenly around the full circumference. Some kits include plastic sleeves that protect the lip from splines, keyways, and sharp shaft shoulders during sliding.

Stepped Drivers vs. Improvised Punches
A stepped driver locates on the flat face of the oil seal's metal case and transfers the hammer blow uniformly. A socket or pipe, by contrast, concentrates force on whatever part of the case it happens to touch, often tilting the seal slightly. Even a tilt of a few thousandths of an inch can distort a metal cased oil seals and leave a crescent-shaped gap between the case and the bore. For large-diameter wheel oil seal installations on heavy axles, hydraulic pressing tools are often used to ensure perfectly square, controlled insertion.

Protective Sleeves for Shaft Features
When an oil seal must slide over a spline, a keyway, or a stepped shaft shoulder, the lip is at grave risk of being cut. A thin plastic installation sleeve, often provided with premium oil seals, temporarily covers these sharp features and guides the lip gently onto the smooth shaft surface. If a sleeve is not available, wrapping the shaft feature with thin plastic tape can provide sufficient protection for a rubber shaft seal. The sleeve or tape must be removed after the seal is in position, never left inside the assembly.
Installing a Rubber Shaft Seal Without Damaging the Lip

A rubber shaft seal combines a flexible outer coating with a precisely molded inner oil lip seal. The outer rubber coating makes it more forgiving of minor bore imperfections compared to metal cased oil seals, but the inner lip remains just as vulnerable to installation damage. Lubrication is essential: the lip and the shaft should be coated with the same oil or grease that the seal will retain in service. This prevents a dry start that can burn the lip within seconds. The rubber shaft seal should be pressed, not hammered, into place using a driver that matches its outer diameter. Any impact that reaches the lip through the case can pop the garter spring out of its groove, rendering the oil lip seal useless before rotation begins.
Lubricating the Oil Lip Seal Before Startup
The oil lip seal relies on a microscopic film of lubricant to survive the first few rotations before system oil reaches the sealing interface. Skipping this step is a common cause of "dry start" failure, where the lip scorches and hardens on a dry shaft. For a rubber shaft seal installed in a transmission flange, a light smear of assembly grease on both the shaft and the lip provides immediate protection. In high-speed applications, even a few seconds of dry running can generate enough heat to permanently damage the oil lip seal elastomer.
Seating a Rubber Shaft Seal Squarely
A rubber shaft seal flexes more than a metal-cased version during installation, which can create a false sense that it is seating correctly when it is actually slightly cocked. Using an alignment pilot that slides into the bore and centers the driver eliminates this risk. Once the rubber shaft seal is flush with the housing face, a final check with a straightedge across the face confirms squareness. An out-of-square rubber shaft seal will leak not because the lip failed, but because the static outer diameter seal was compromised from the start.

Metal Cased Oil Seals: Press-Fit Precision

The installation of a metal cased oil seals requires a different level of care. The rigid steel case has little ability to conform to bore irregularities, so any dirt, burr, or misalignment will prevent it from sealing correctly. A metal cased oil seals must be started perfectly square by hand before any tool touches it. Once the seal is partially engaged in the bore, a flat-faced driver sized to contact the case edge is used to tap it home with short, controlled blows. The sound changes as the metal cased oil seals bottoms out - from a hollow ring to a solid thud - signaling that the case is fully seated against the bore shoulder. At this point, the metal cased oil seals has achieved its designed interference and will resist both internal pressure and vibration.
Avoiding Case Distortion in Metal Cased Oil Seals
A thin-walled metal cased oil seals can distort if driven unevenly, taking on a slightly oval shape that leaks. The telltale sign is a visible gap between the case and the bore that varies around the circumference. Once distorted, a metal cased oil seals cannot be straightened; it must be removed and replaced. The cost of a ruined seal far exceeds the price of the correct installation tool, making the investment in a proper driver one that pays for itself immediately.
Temperature Conditioning for Metal Cased Oil Seals
In cold environments, a metal cased oil seals can become brittle and more prone to cracking during installation. Warming the seal to room temperature before pressing it in reduces the risk. Conversely, on large cast-iron housings that contract in the cold, gently warming the housing can expand the bore enough to ease installation without compromising the interference fit once the assembly returns to operating temperature.

Cassette Oil Seal Handling and Placement

A cassette oil seal represents the most integrated and protected design, packaging a primary lip, wear sleeve, dust lips, and labyrinth into a single pre-lubricated unit. The installation procedure for a cassette oil seal is different from that of a standard oil seal because the unit is a complete cartridge that must be pressed onto the shaft and into the bore simultaneously without separating its internal components. The cassette oil seal is typically driven using a special tool that contacts the outer metal shell, never the inner wear sleeve. Once installed, the cassette oil seal provides unmatched contamination exclusion, which is why it has become standard on severe-duty wheel oil seal applications in mining, forestry, and waste management.
One-Piece Assembly Advantage of a Cassette Oil Seal
Unlike a conventional oil lip seal that requires separate handling of the wear sleeve, a cassette oil seal arrives as a single, inseparable unit. The factory-assembled clearance and pre-lubrication remove the risk of incorrect axial positioning during field installation. A cassette oil seal installed on a wheel oil seal application will maintain its integrity even if the axle breathes heavily or the hub undergoes thermal cycling, because the internal labyrinth equalizes pressure without ingesting water or dirt.
Installation Depth Control for Cassette Oil Seal
A cassette oil seal must be driven to a specific depth relative to the housing face to ensure that the wear sleeve aligns correctly with the shaft. Driving it too deep can cause the inner components to bottom out against the bearing, generating friction and heat. Driving it too shallow leaves part of the sleeve unsupported, inviting shaft misalignment to overload the lip. Many cassette oil seal tools include a depth-stop flange that contacts the housing when the correct position is reached, removing guesswork.

Wheel Oil Seal and Front Hub Oil Seal Procedures

Heavy-duty truck and trailer axles frequently require replacement of the wheel oil seal and the front hub oil seal during brake overhauls. The wheel oil seal retains gear oil in the hub cavity while the vehicle is in motion, enduring both centrifugal forces and brake-generated heat. The front hub oil seal faces the additional complexity of steering articulation; as the knuckle pivots, the front hub oil seal must flex without unseating from its running track. Replacing either a wheel oil seal or a front hub oil seal demands meticulous cleaning of the spindle and hub bore, because any residual brake dust mixed with oil creates an abrasive paste that will destroy the new seal rapidly.
Front Hub Oil Seal Alignment
The front hub oil seal is often larger in diameter than a standard wheel oil seal and more sensitive to installation squareness. A cocked front hub oil seal will wear unevenly and develop a crescent-shaped leak within the first few thousand miles. Many front hub oil seal designs now include an integrally molded alignment ring that pilots into the hub bore, making square installation far easier than with older designs. When this alignment ring is absent, using a purpose-made driver with a centering cone is essential for achieving a leak-free front hub oil seal installation.
Torqueing and Preload After Wheel Oil Seal Replacement
Installing a wheel oil seal is only one part of the wheel-end assembly process; the bearing preload adjustment that follows directly affects the seal's operating conditions. Excessive preload generates heat that bakes the wheel oil seal elastomer, while insufficient preload allows shaft play that the wheel oil seal cannot follow. Following the manufacturer's torque-and-back-off procedure precisely protects both the bearings and the new wheel oil seal from premature failure.
Truck Oil Seal and Heavy Vehicle Considerations
A truck oil seal lives a harder life than most industrial seals. It endures constant vibration from the driveline, exposure to road chemicals, wide temperature swings from cold-soaked winter starts to summer highway runs, and occasional impact loads from potholes. Installing a truck oil seal therefore demands extra attention to cleanliness, lubrication, and protective measures. A truck oil seal that is marginally installed may survive on a passenger car but will likely fail quickly on a loaded tractor unit. Many fleet maintenance programs now treat truck oil seal replacement as a two-person job: one to handle the clean seal and tooling, and one to manage the heavy hub and spindle components without contaminating the sealing surfaces.

Chemical Protection for Truck Oil Seal Outer Case
In regions where roads are treated with calcium chloride or magnesium chloride for dust suppression or de-icing, the outer case of a truck oil seal is exposed to highly corrosive brine. Applying a thin, non-hardening sealant to the outer diameter of the truck oil seal before installation can protect the case-to-bore interface from corrosion-driven leakage. This step is especially important for truck oil seal installations on aluminum hubs, where galvanic corrosion can rapidly pit the bore surface.
Vibration-Resistant Installation of a Truck Oil Seal
Heavy truck drivelines transmit torque pulses that vibrate through the axle housing. A truck oil seal must maintain its press fit despite this constant vibration. The interference fit specified for a truck oil seal is often tighter than that for a stationary industrial seal of the same diameter. Using a retaining compound on the outer case of a truck oil seal adds a secondary locking mechanism that prevents rotation or walking, particularly on vehicles that operate extensively on unimproved roads.
High Pressure Rotary Seal Installation Protocols

Installing a high pressure rotary seal demands an entirely different level of precision because the seal must contain fluid at pressures that would instantly extrude a conventional oil lip seal. A high pressure rotary seal typically features a reinforced lip geometry, a backup ring, and a very tight clearance between the shaft and the housing. Before installing a high pressure rotary seal, the shaft must be inspected for runout using a dial indicator; eccentricity that a standard oil seal might tolerate will cause a high pressure rotary seal to leak immediately. The backup ring must be oriented correctly; installing it on the wrong side of the high pressure rotary seal guarantees blowout at system startup.
Backup Ring Orientation in High Pressure Rotary Seal
The backup ring in a high pressure rotary seal assembly is a split or scarf-cut thermoplastic ring that prevents the elastomeric lip from extruding into the clearance gap. It must always be positioned on the downstream, low-pressure side of the high pressure rotary seal. A reversed backup ring acts as a ramp that funnels the elastomer into the gap, and the high pressure rotary seal will fail within seconds of pressurization. Documenting the disassembly orientation with photographs is a discipline that veteran hydraulic technicians practice religiously.

Cleanliness Requirements for High Pressure Rotary Seal
Contamination that would be merely annoying in a low-pressure oil lip seal becomes catastrophic in a high pressure rotary seal. A single particle of dirt trapped between the lip and the shaft can cut a groove that bleeds pressure. All components involved in a high pressure rotary seal installation - shaft, housing, backup ring, and the seal itself - must be cleaned to a level approaching surgical cleanliness and assembled under conditions as dust-free as the service environment permits.
Cylinder Oil Seal and Flange Oil Seal Mounting

A cylinder oil seal seals the piston rod in a hydraulic cylinder, where it must withstand both reciprocating and occasional rotary motion. Installing a cylinder oil seal involves carefully stretching or sliding the seal over the rod end without nicking the lip on the threads or shoulder. A flange oil seal, by contrast, is a static face seal that compresses between two flat machined surfaces. Mounting a flange oil seal requires even bolt torque to avoid warping the flange and creating a leak. Both cylinder oil seal and flange oil seal installations benefit from the use of assembly lubricant compatible with the system fluid, applied sparingly to avoid hydraulic lock in blind holes.
Cylinder Oil Seal Rod Protection
When a cylinder oil seal is being installed over a threaded rod end, the sharp crests of the threads act like a series of knife edges. A thin plastic sleeve or a wrap of shim stock must protect the cylinder oil seal lip during this passage. Once the cylinder oil seal is seated in its gland, the sleeve is removed and the rod is cycled slowly by hand to verify that the cylinder oil seal tracks smoothly without rolling or bunching.

Flange Oil Seal Bolt Torque Sequence
A flange oil seal requires uniform compression across its entire circumference to function. Tightening the flange bolts in a star or cross pattern, in multiple incremental passes, ensures that the flange oil seal compresses evenly. Uneven bolt torque tilts the flange slightly and unloads one side of the flange oil seal, creating a path for fluid escape. On large-diameter flanges, a second torque pass after the assembly has heat-soaked to operating temperature often reveals loose fasteners that must be retightened to maintain the flange oil seal's integrity.
Quality Control Checks After Oil Seal Installation
Once the oil seal is installed, a series of checks can catch problems before the machine is returned to service. Rotating the shaft by hand should feel smooth, with no audible scraping, clicking, or uneven drag that might indicate a dislodged spring or a folded lip. For a cassette oil seal, a visual check through the labyrinth gap can confirm that the internal components remain aligned. A static pressure test, where applicable, will reveal any gross leakage at the outer case or through the lip. These few minutes of verification are far less expensive than the teardown that follows an undetected installation error.
Post-Installation Run-In for an Oil Seal

A newly installed oil seal benefits from a controlled run-in period during which the lip beds against the shaft and the lubricant film stabilizes. Operating the machine at reduced speed and load for the first half-hour allows the oil lip seal to establish its hydrodynamic film without overheating. For a truck oil seal or wheel oil seal, a short test drive with frequent stops to check for leakage can reveal problems while the vehicle is still close to the maintenance bay.
Common Installation Mistakes That Ruin an Oil Seal
The same mistakes appear in workshops around the world, regardless of industry or equipment type. Driving an oil seal with a socket that contacts the inner face pushes the garter spring out of its groove. Forgetting to lubricate the lip leads to dry-start scorching. Installing a directional oil lip seal backward converts it into an oil pump aimed at the atmosphere. Reusing an old wear sleeve with a new cassette oil seal leaves a grooved surface that destroys the new lip. Using a hammer directly on a metal cased oil seals dents the case and breaks the static outer seal. Each of these errors is avoidable with training, proper tools, and the discipline to pause and check before proceeding.

Building an Oil Seal Installation Culture in Maintenance Teams

Organizations that achieve consistently long oil seal life do so through culture, not just procedure. They stock the correct drivers, sleeves, and cleaning supplies at every workstation. They photograph assemblies before disassembly so orientation is never in doubt. They treat an oil seal installation not as a quick task squeezed between bigger jobs but as a craft operation that deserves focus and respect. A front hub oil seal installed correctly on a fleet truck quietly delivers hundreds of thousands of miles of service. That reliability is not accidental; it is the direct result of a team that refuses to accept short-cuts and understands exactly what is at stake inside that small, precision-engineered ring.